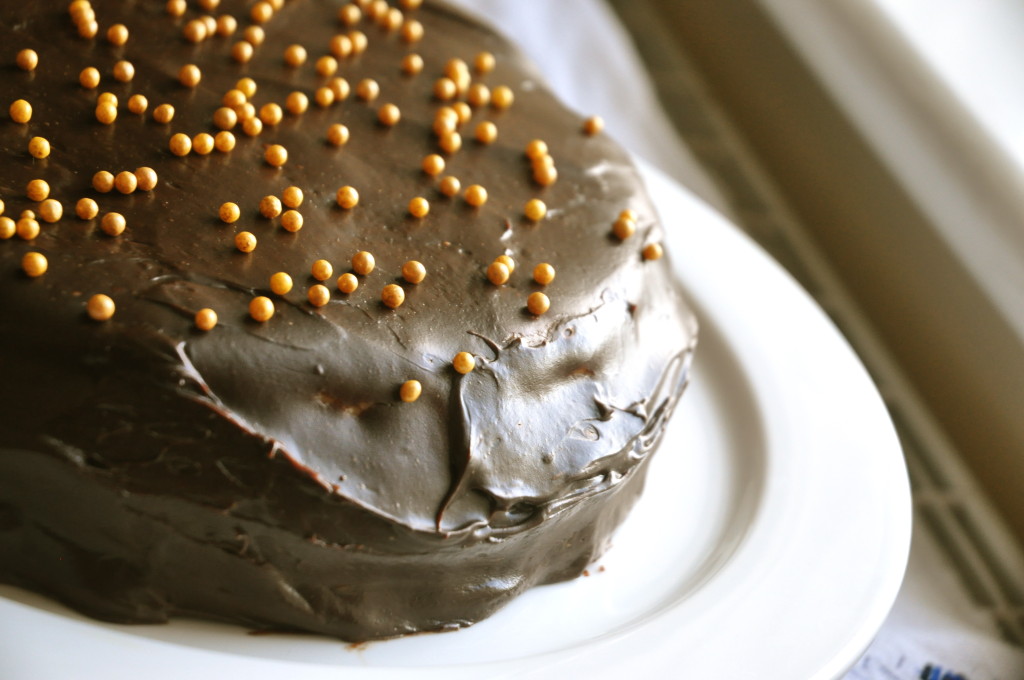
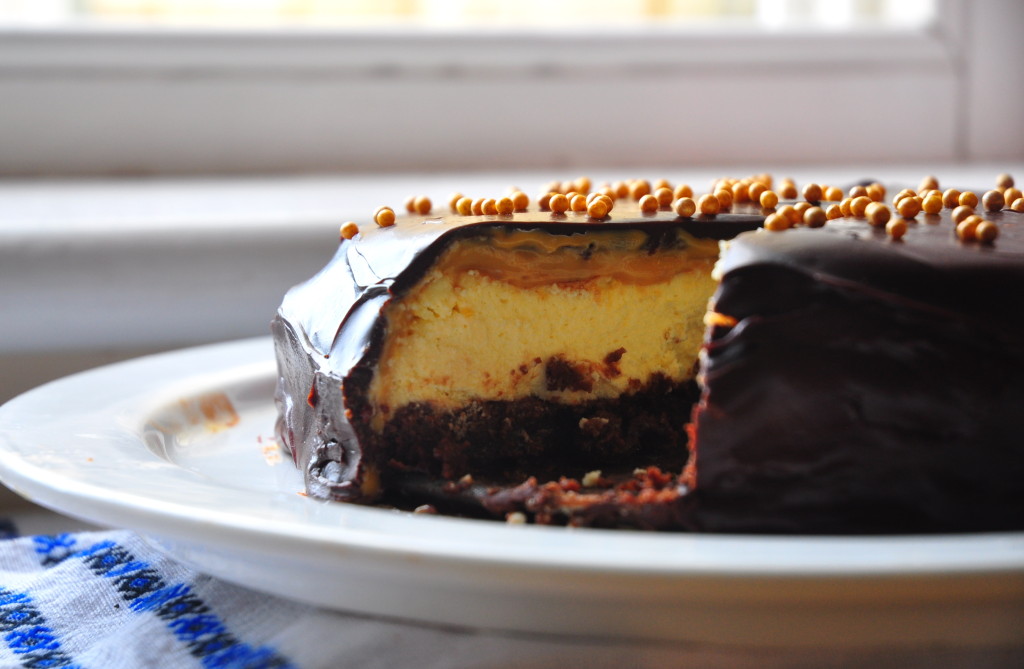
I had some friends over for dinner yesterday. It was such a lovely evening although I felt like such a glutton at the end of it! For starters, we had this cheesy Mexican refried bean dip. Then I made pulled pork which had slow cooked for 8 hours to the point where it felt to pieces when touched with a fork. Then for dessert, by special request, we had a brownie bottomed millionaire cheesecake. What on earth is that? I hear you cry. Well, let me tell you, this is no ordinary cheesecake. Instead of a biscuit base, it has a fudgey chewy brownie layer. Sitting on top of that is a thick, creamy layer of baked vanilla cheesecake and to make it even more over the top it has a thick layer of dulce de leche spread over it. Finally, the whole thing is smothered in chocolate ganache. That is a brownie bottomed millionaire cheesecake. As this is a baking blog, I’ll only be posting the recipe for the dessert but both the bean dip and the pulled pork were ridiculously easy to make. I can see myself dreaming up excuses to make them again some time soon. :P

The golden balls are optional, but I think they are a nice touch and represent a hint of the caramel goodness hiding inside.
The cheesecake itself was extremely indulgent. The brownie base was delicious, although it inexplicably became almost sticky as well as fudgey. Don’t get me wrong – it tasted absolutely divine, but it made cutting up the slices a bit of a challenge. By the time I had hacked out a piece it had become a “deconstructed” brownie bottomed millionaire cheesecake. But it still tasted delicious. I really liked the creaminess of the vanilla cheesecake as a contrast to the rich dark chocolate of the brownie base. The dulce de leche topping was sticky and delicious as ever and the dark chocolate ganache made it a really special dessert.
This recipe has multiple steps and takes a fair bit of time to prepare, so it’s not really an everyday recipe. That being said, nothing was too technically difficult to make and it is definitely a show-stopper of a dessert!
Happy Baking!
Brownie Bottomed Millionaire Cheesecake
Serves 16
Ingredients:
- 100g 70-80% dark chocolate
- 1/2 cup butter
- 2 1/4 cup sugar, divided
- 5 large eggs, divided
- 1/4 cup milk (I forgot this – oops!)
- 2 tsp vanilla extract, divided
- 1 cup plain/all-purpose flour
- 1/2 tsp salt
- 3 x 250g packages of full fat cream cheese, softened
- 1/2 cup sour cream
- 1 can dulce de leche (see below for instructions)
- 150-250 ml double/whipping cream
- 200g plain/semisweet chocolate
- 100g milk chocolate
Instructions:
- Preheat the oven to 325F/165C. Butter a 9″ spring form pan and line the bottom and sides with baking parchment.
- Melt the chocolate and butter together by microwaving in 20-30 second intervals, stirring frequently. Add 1 1/2 cups of sugar and mix well.
- Add two of the eggs, one at a time, mixing on low speed after each addition until just blended. Add the milk and 1 tsp of vanilla and mix well.
- Sift together the flour and salt in a medium sized bowl. Gently fold into the chocolate mixture until just blended. Put in preheated oven and bake for 25 minutes.
- Meanwhile, beat the cream cheese, remaining 3/4 cup of flour and 1 tsp of vanilla in a large bowl with an electric mixer on medium speed until well blended. Add the sour cream and mix well. Add the remaining 3 eggs one at a time, mixing on low speed until just blended.
- Pour the cheesecake mixture over the brownie layer. Bake for 55 – 60 minutes until the centre is almost set. Run a knife around the rim of the pan to loosen the cake. Let cool completely on a wire rack.
- Once the cake is cool, topped with the dulce de leche. Chill for at least 30 minutes.
- Unmould the cake from the pan. Place on a wire rack over a baking tray. Gently spread the warm ganache over the top and sides of the cake. You can scrape any excess off from the baking tray and reapply to the cake (or just eat it).
- Chill for at least 4 hours or overnight. Remove from the fridge 30 minutes before serving.
Dulce de Leche
You will need:
- 1 tin of condensed milk (e.g. Carnation)
- 1 deep medium sized pot
- water (+ a jug)
Instructions:
- Put the tin of condensed milk on it’s side inside the pot. Fill the pot with water so that the tin is covered, ideally by at least an inch of water. If you’re pot is deep enough, you can stand the can upright, but I needed to place it on it’s side so that it was adequately covered.
- Bring the water to a boil. Then reduce heat and simmer for 2 – 2.5 hours. Top up the water each time you check it (every 15 min or so) so that the tin remains covered by a good inch of water.
- Let cool completely before opening the tin.
WARNING: Keep checking on it as it simmers away. DO NOT let the water evaporate so that the can is exposed to the air. This could result in the tin EXPLODING. Needless to say, a can of exploding molten caramel is very dangerous and I will say in advance that you do this at your own risk! (Really it’s quite safe, but I feel compelled to write this warning)
Chocolate Ganache
- Break the semisweet and milk chocolate up into small pieces. Melt the chocolate in the microwave, heating in 20 second intervals and stirring frequently.
- Heat the cream over med-high heat until it just begins to boil. Immediately remove cream from the heat and slowly pour over the melted chocolate. Let it stand for about a minute before gently stirring it with a wire whisk. If it starts to look lumpy and curdled, slowly add more cool cream and keep stirring. Have faith, it will become smooth and glossy and everything you hoped it would be.
- Wait 5-10 minutes or until the ganache is still pourable but cool enough to spread and it won’t just run off the sides of the cake.


Comments are closed.