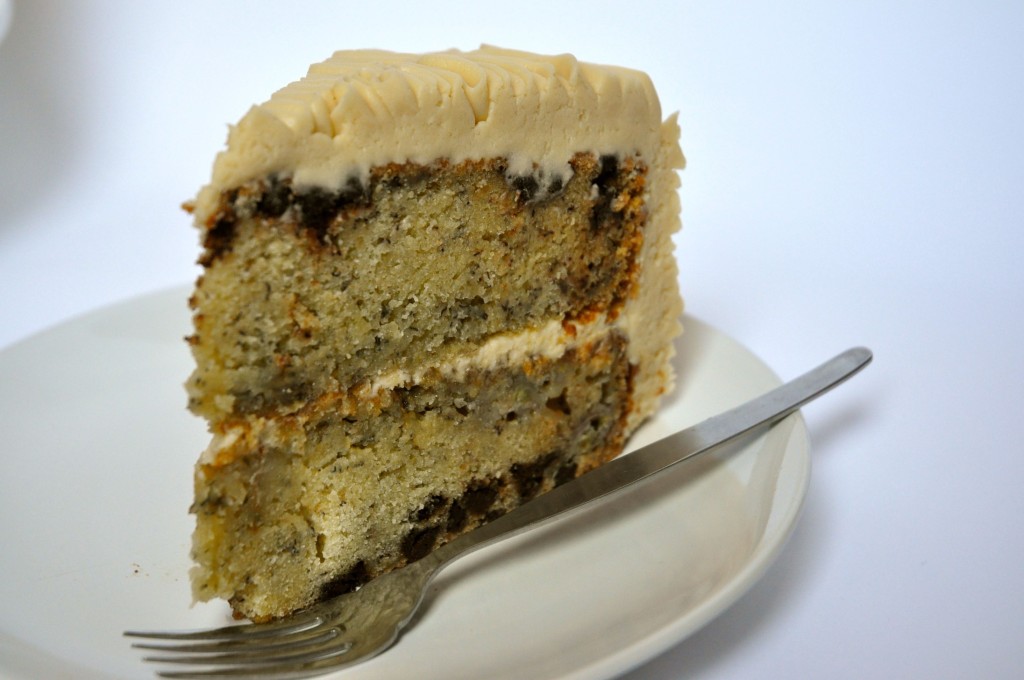
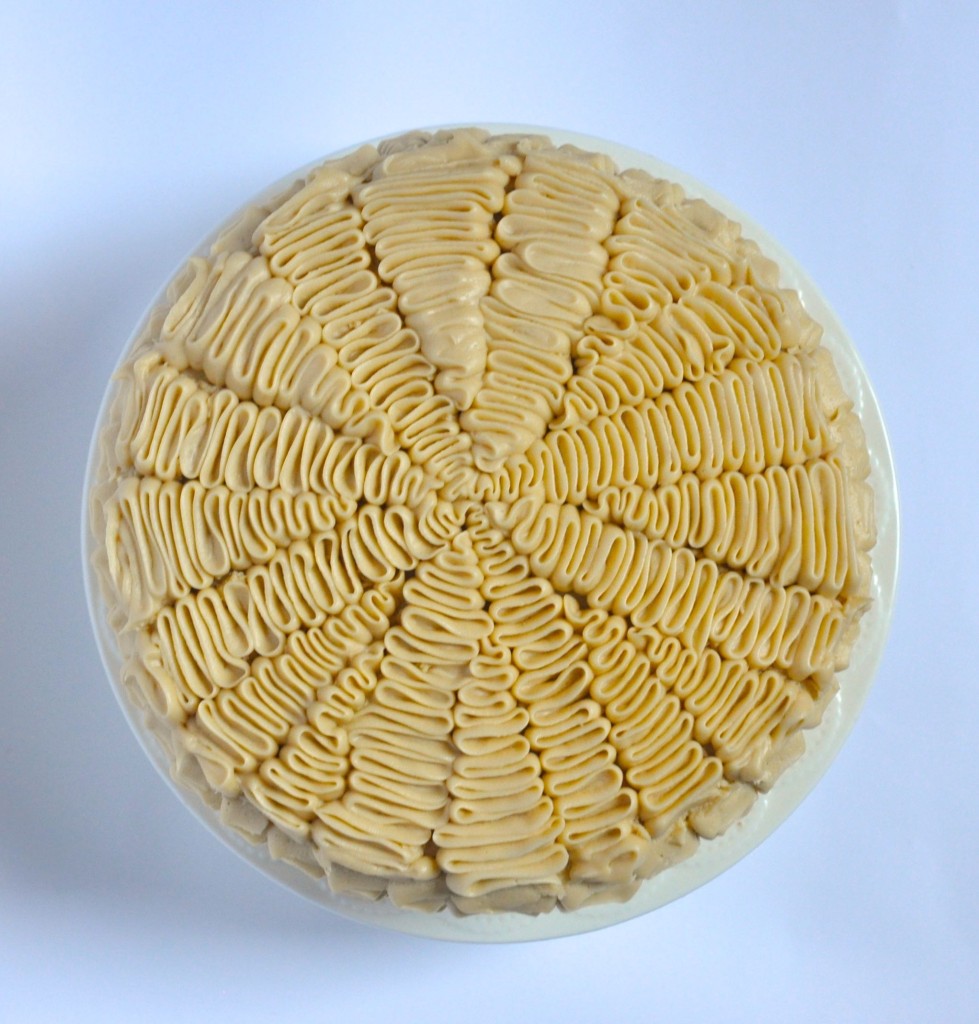
This post is well overdue. I made this cake about a fortnight ago because I left like it had been ages since I had made a layer cake. There was also a bunch of brown spotty bananas on the kitchen table. I also wanted to experiment with more unusual flavour combinations et voila – this Coffee Banana Layer Cake was born.
The banana cake is one that I have come across before, although the original recipe is for a 9″x13″ sheet cake. However, I decided that it would do fine as a layer cake and I had even already modified it for that purpose last year in this cute little 6″ banana cake. I added chocolate chips to the batter and I was disappointed to see that they all sank to the bottom of the tin during baking. This isn’t the first time this has happened to me (recall the disastrous White Chocolate Raspberry cake that destroyed my cake stand). However, I coated the chocolate chips in flour and sent a prayer to the baking gods. Sadly, no one heard my quiet plea and the chocolate chips had stubbornly sank down to the bottom of the tin. If anyone has any tips on how to prevent this, I would love to hear about it!
The coffee icing is a simple modification of my favourite cream cheese icing. Simply add 1-2 tbsp of concentrated coffee to the icing and you get instantly fluffy and delicious coffee flavoured icing. If you think you’d prefer to have this cake with a simple cream cheese buttercream, then leave it out and follow the rest of the recipe exactly as written. A warning in advance though, the icing recipe is huge. The ruffle piping technique uses quite a bit of icing, more than you would need if you were simply slathering it on. So, if you like less icing on your cakes, then you may consider halving the recipe and only frosting the middle and the top of the cake.
I thought it tasted delicious. Very moist with a good banana flavour. Despite the sinking of the chocolate chips, they were still a nice extra kick of dark chocolate. My flatmate thought that the coffee buttercream overpowered the banana flavour but I quite enjoyed the unusual contrast. I’ll leave it up to you to decide if coffee and banana suits your taste buds.
This weekend I’m planning on baking again in honour of yesterday’s World Nutella Day. I usually have a jar of Nutella stashed away in my cupboard, so I barely had to go out and buy any ingredients. Stay tuned for pictures and recipes of that indulgent treat!
Coffee Banana Cake
Banana Cake
Adapted from allrecipes.com
Makes one 8″ 2 layer cake, feeds 12-16
Ingredients:
- 3/4 cup/170g unsalted butter, room temperature
- 2 1/8 cups/425g white sugar
- 3 large eggs
- 2 tsp vanilla extract
- 3 cups/ 375g all purpose/plain flour
- 1 1/2 tsp baking soda
- 1/4 salt
- 355 ml buttermilk (add a few tsp vinegar/lemon juice to normal milk)
- 2 tsp lemon juice
- 1 1/2 cups/340g mashed bananas
- 100g plain/semisweet chocolate chips
Instructions:
- Preheat the oven to 135C/275F. Grease, flour and line the bottom of 2 x 8″ round cake tins. In a small bowl, mix the mashed bananas with the lemon juice and set aside.
- In a medium sized mixing bowel, sift together the flour, baking soda, and salt. Set aside.
- Using an electric mixer, cream together the butter and sugar until light and fluffy (~2 min). Beat in the eggs one at a time, mixing well after each addition. Stir in the vanilla.
- Starting and ending with the flour, mix in the flour alternately with the buttermilk. (i.e. 1/3 of the flour, 1/2 of the buttermilk, 1/2 of remaining flour, remaining buttermilk, remaining flour mixture). Stir in the banana and chocolate chips. Divide the batter evenly between the prepared pans.
- Bake in the preheated oven for 30-1 hour. Sorry for the huge time range but these cakes really surprised me with how long they would take. I thought they would be done around 40 min, but they took much longer. So, start checking around 30 min and if they look almost done, recheck after 5 min. If they are no where near done, recheck after 10-15 min. Keep checking every 5-10 minutes after that. They are done when a toothpick inserted into the centre comes out clean.
- Remove from the oven and place directly in the freezer for 45 minutes. Remove from freezer and once at room temperature, run a knife around the edge of the cake and flip upside down to remove from the cake tin. Ice with coffee buttercream and enjoy!
Coffee Buttercream
Makes enough to very generously ice a 2 layer 8″ round cake
Ingredients:
- 250g unsalted butter, softened
- 250g full fat cream cheese, room temperature
- 1-2 tbsp concentrated coffee (mix a large spoonful of instant coffee with 1-2 tbsp of boiling water, set aside to cool)
- 1 kg of icing sugar, sifted (yup…)
- 1 tbsp vanilla extract
Instructions:
- Cream together the butter and cream cheese until light and creamy. There should be no big chunks of either the butter or the cream cheese. Mix in the vanilla extract.
- Gradually beat in the icing sugar, adding a small amount at a time and mixing well after each addition. Mix in the concentrated coffee.
- Beat on high for a further 1-2 minutes until very light and fluffy. Use immediately.
- Optional: use a small triangle tip to pipe ruffles up the side of the cake. Hold the piping bag so that the small point of the triangle is facing towards you and zigzag up the side of the cake. Repeat all around the cake.


