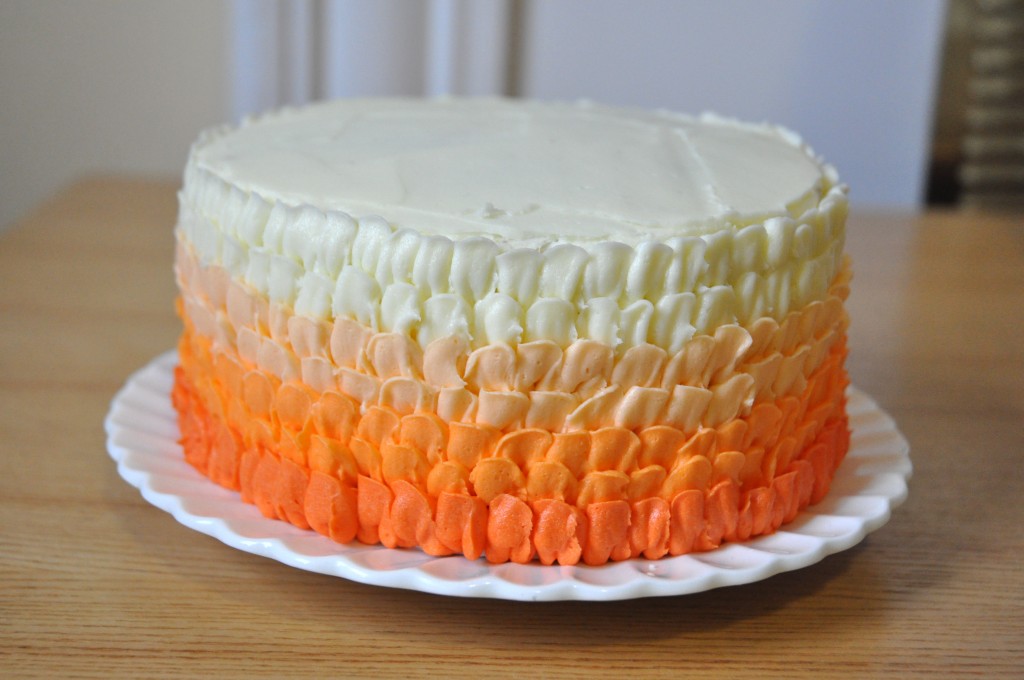
Last week I made a chocolate orange marble cake and decorated with orange buttercream petals. I loved this cake so much that I decided to do a tutorial on how to create this simple but beautiful technique.
I also have included a video tutorial on how to pipe the petals. It’s so much easier than trying to explain it using words and photos! Let me know what you think of the Baking Medic’s youtube debut. :)
Petal Cake Tutorial
You will need:
- 1 recipe of buttercream icing
- three 6″ cakes, levelled
- 1 offset spatula
- 1 large disposable piping bag
- 1 Wilton #103 petal tip (or any petal tip)
- 1 piping bag coupler (optional, but will make your life A LOT easier)
- cling film/saran wrap
- cake turn table (optional, but again makes life easier)
- orange and red gel food colouring
Instructions:
Smear a small amount of icing onto the top of your cake board and place the bottom layer dome side up on the centre of the cake board. The icing will hold the cake in place. Spread a thin layer of icing over the top of the bottom layer. Centre the second layer of cake over the bottom one, dome side up. Spread a thin layer over the top of the middle layer as well. Place the top layer dome side down onto the middle layer. You may have to give your layers a gentle nudge with the palm of your hand in order to make sure they are all aligned and centred.
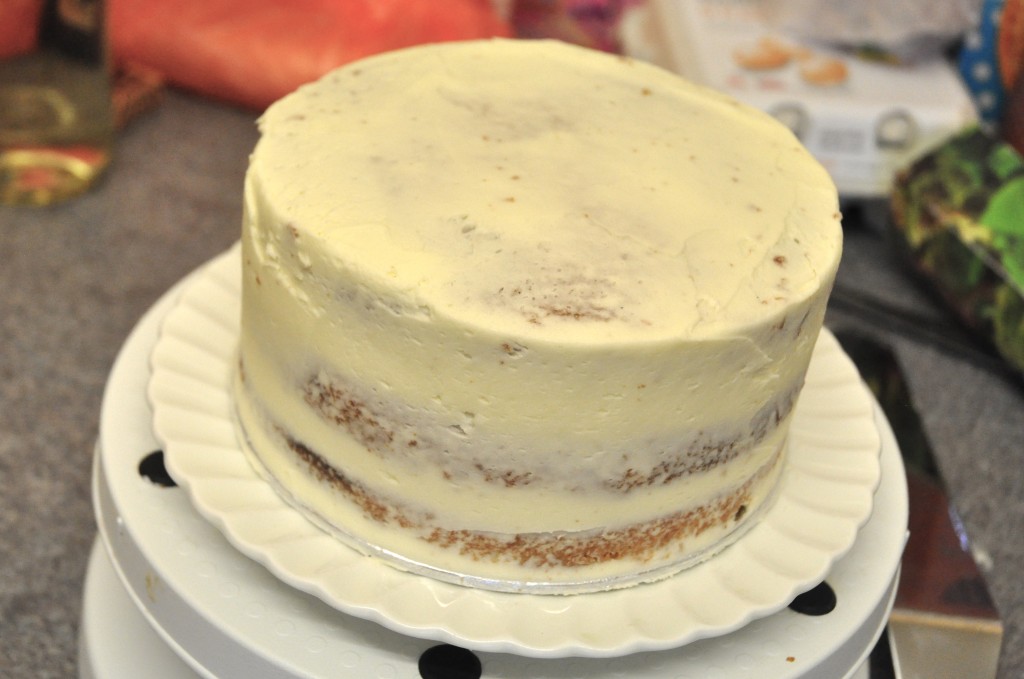
Crumb coat your cake by using an small offset spatula to coverthe surface with a thin layer of icing, making sure all of the spaces between layers are filled. Place the cake in the fridge for 15 minutes.
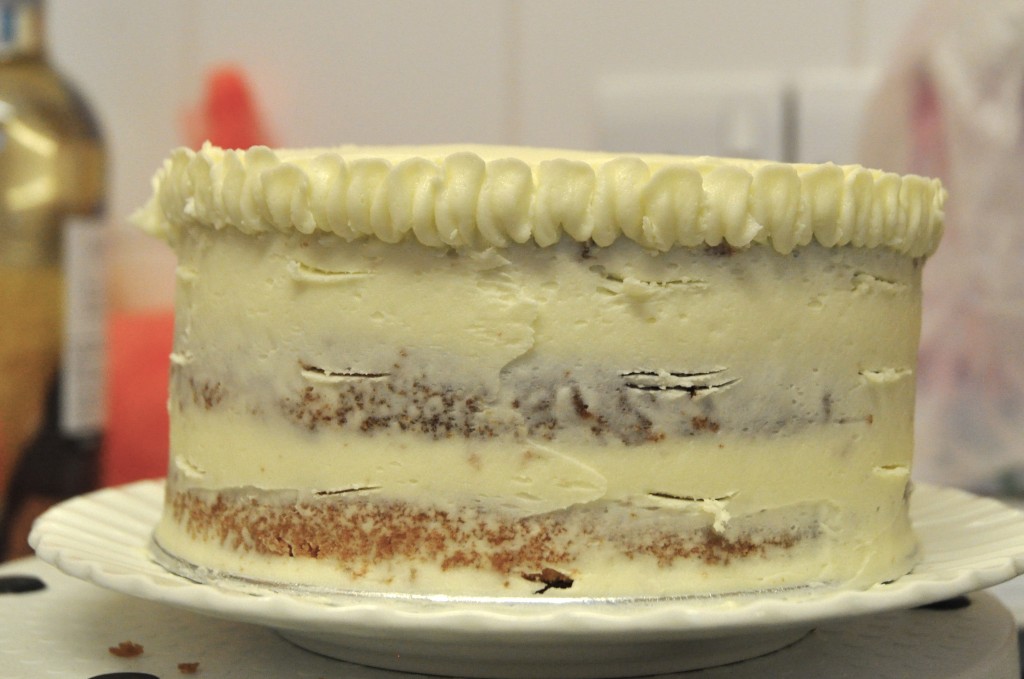
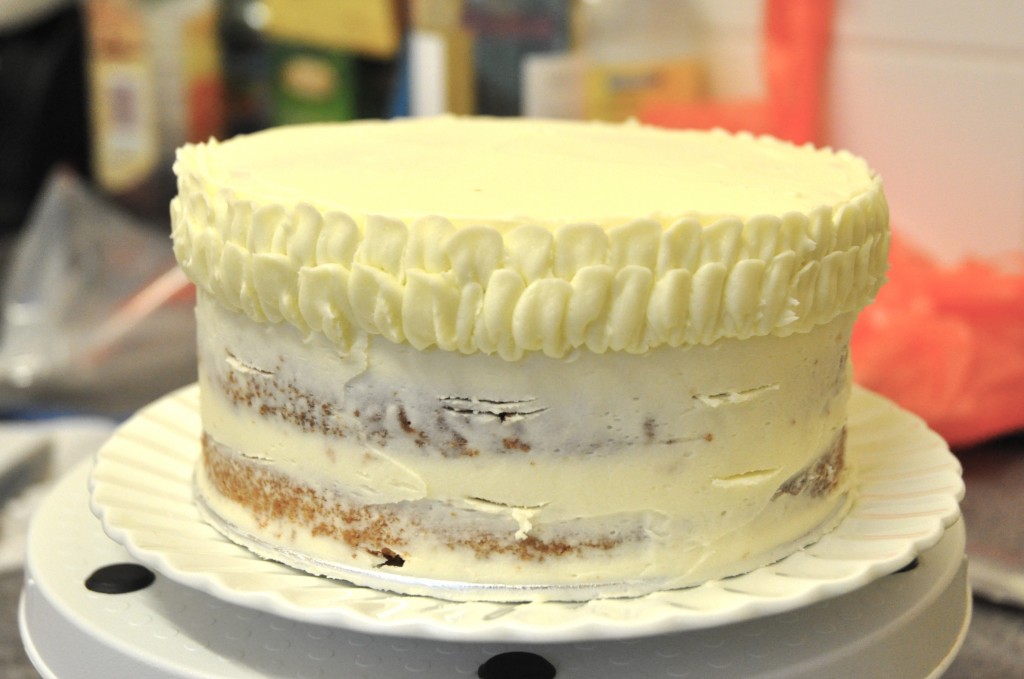
Place a dollop of icing onto the top of the cake and use your (cleaned!) offset spatula to smooth it out. You are aiming for a thin but even layer of icing. A lot of icing will be going onto the sides of the cake, so you don’t want to make it sickly by putting too much on the top. In hindsight, I would have liked to have just a little thicker icing on top of my cake as you can see some shadows of the cake underneath. O well. Spread the icing so that a small lip overhangs the edge of the cake. Run the offset spatula around the side of the cake so you get a clean, crisp edge. Be sure to keep cleaning the excess icing off your spatula each time you take it off the cake.
Snip the end off the disposable piping bag so that the coupler fits snugly in the bottom.
Icing Burrito Trick
Right. Next is a trick that will blow your mind – well it certainly blew mine when I first discovered it! This simple trick will allow you to save so much time and means you only need one piping bag for this entire cake! It also means you only need one piping tip because I’m guessing most people don’t have four or five petal tips just lying around.
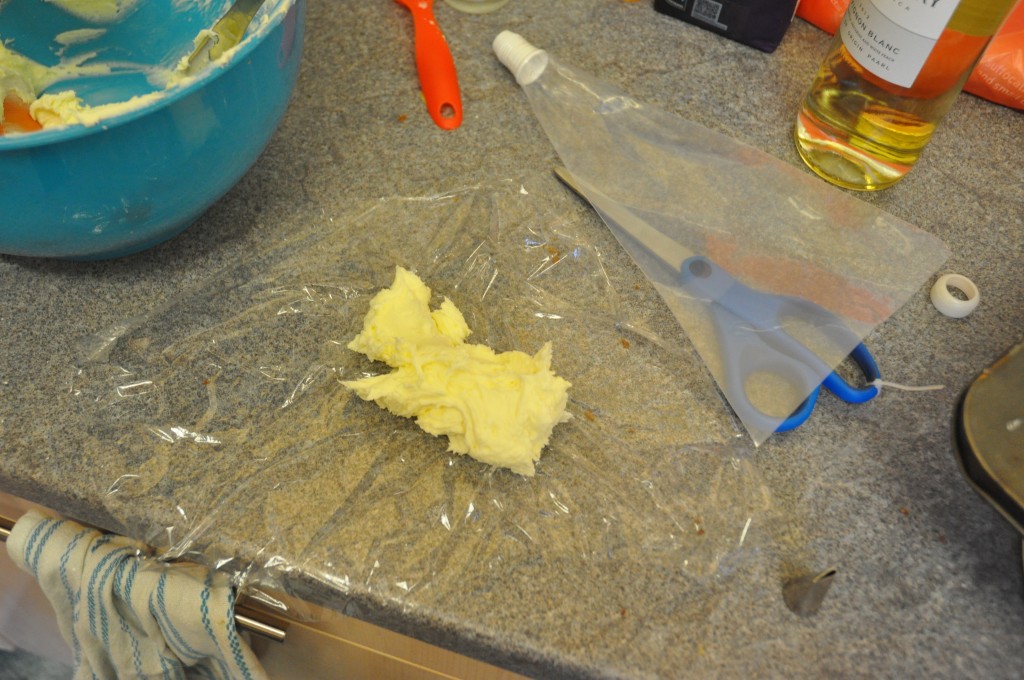
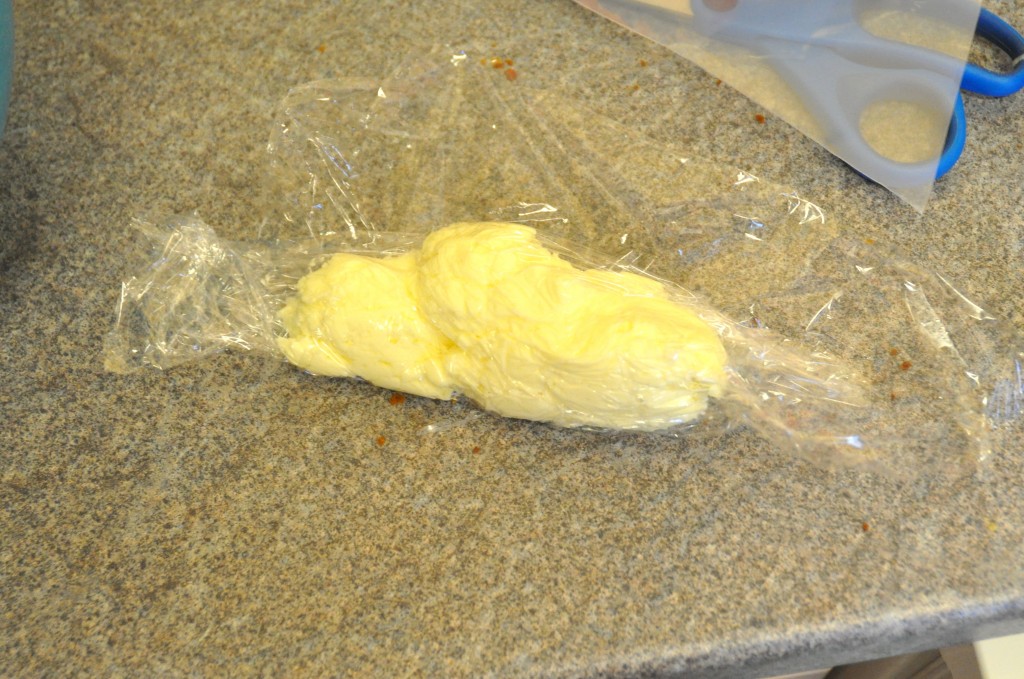
Lie a medium sheet of cling film/saran wrap onto the counter and place a large dollop of icing in the centre of it.
Roll up the cling film/saran wrap like your rolling up a burrito or wrap.
Grab the two loose ends and then swing it so that your icing burrito twists around and the ends become closed. Think like you’re twisting up a towel in preparation for whipping someone with it. :P
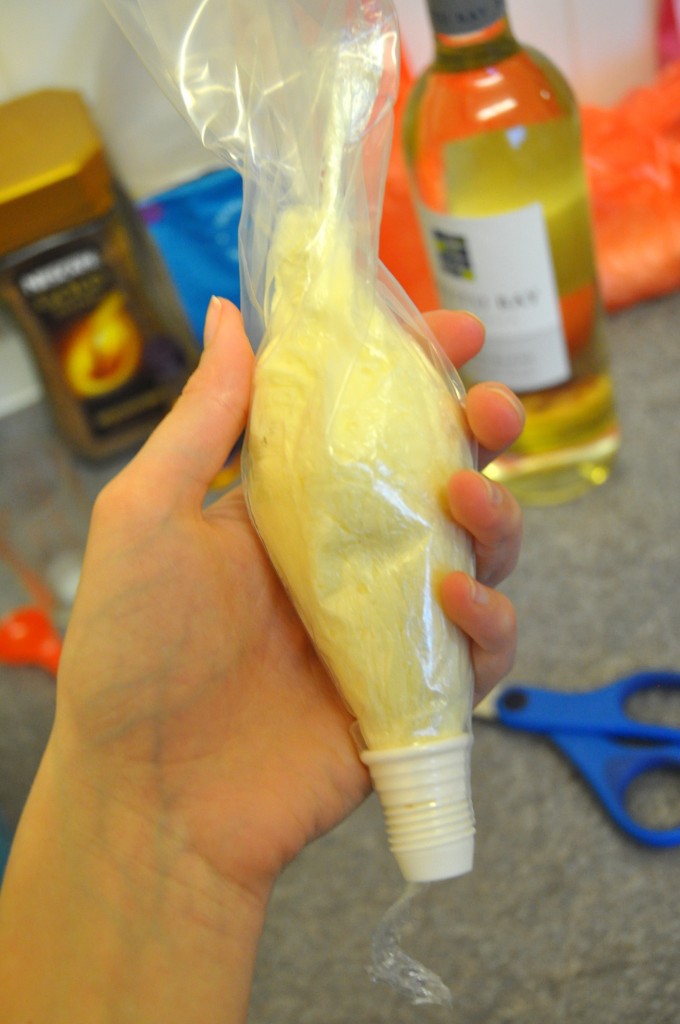
Slide the icing burrito into the piping bag and pull one of the loose ends through the bottom of the piping bag. This bit is a bit tedious as it can be hard to get a good grip on the end, but persevere, my friend! It’s definitely worth it.
Once you have pulled one end of your burrito through the end of the piping bag, cut off that end. Attach the petal tip to the end of the piping bag, twist the top of the piping bag tight, and you’re ready to go!
The best bit about this is that when you’re done with that colour, simply remove your icing burrito, make a new one with your different colour and place it into the piping bag in the exact same way as above. Genius! I wish I could say that I thought this up myself, but sadly not.
Optional: I used a knife and marked a few lines all around my cake as a guide so that my rows would be mostly level. I had originally planned on having four colours with two rows each, but I didn’t quite have enough room. Instead, I had four colours, but the darkest colour is only one row. I’m saying this step is optional because I ended up ignoring my guides and it turned out just fine.
With your first colour, pipe a row of petals around the top of the cake. Â With the thick part of the tip against the cake, apply pressure to the piping bag and slightly twist/move your wrist in a clockwise direction. It takes a bit of practice, but actually quite easy. Plus you’ll get lots of practice if you decided to make this cake!
Here is a video tutorial that I made on how pipe petals.
Pipe a second row of petals, slightly overlapping with the row above.
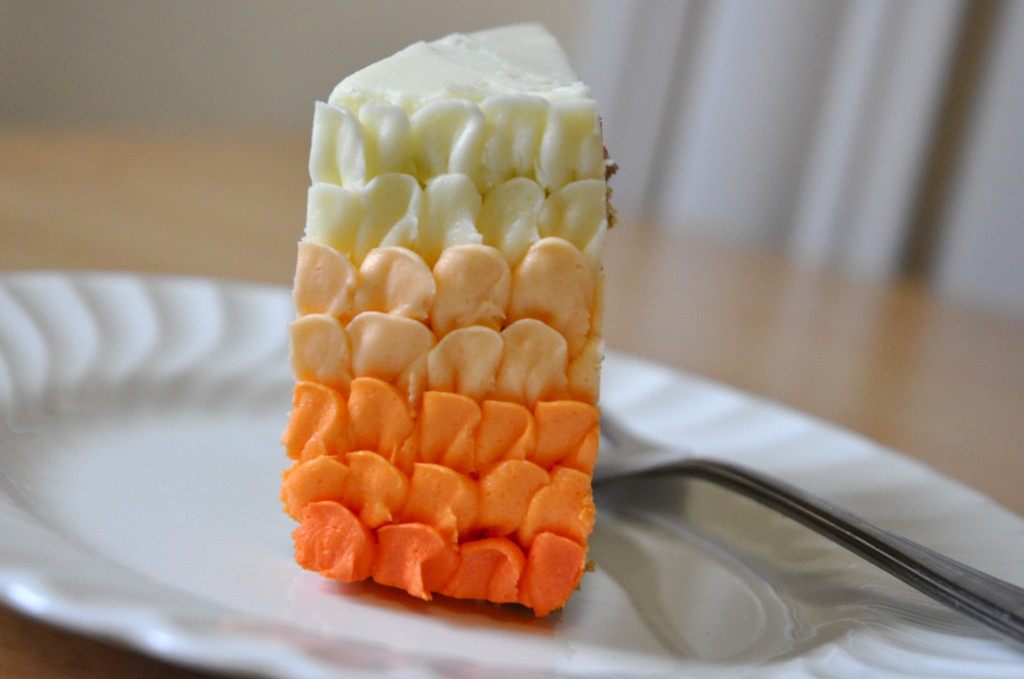
Continue to pipe rows of petals, trying to keep the rows level and even. After you have piped two rows in one colour, simply add a bit more food colouring to the icing so that it is the desired shade. I used orange gel food colouring and then added a tiny bit of red for the final row. Use the icing burrito trick, place the new colour in the piping bag and keep going!
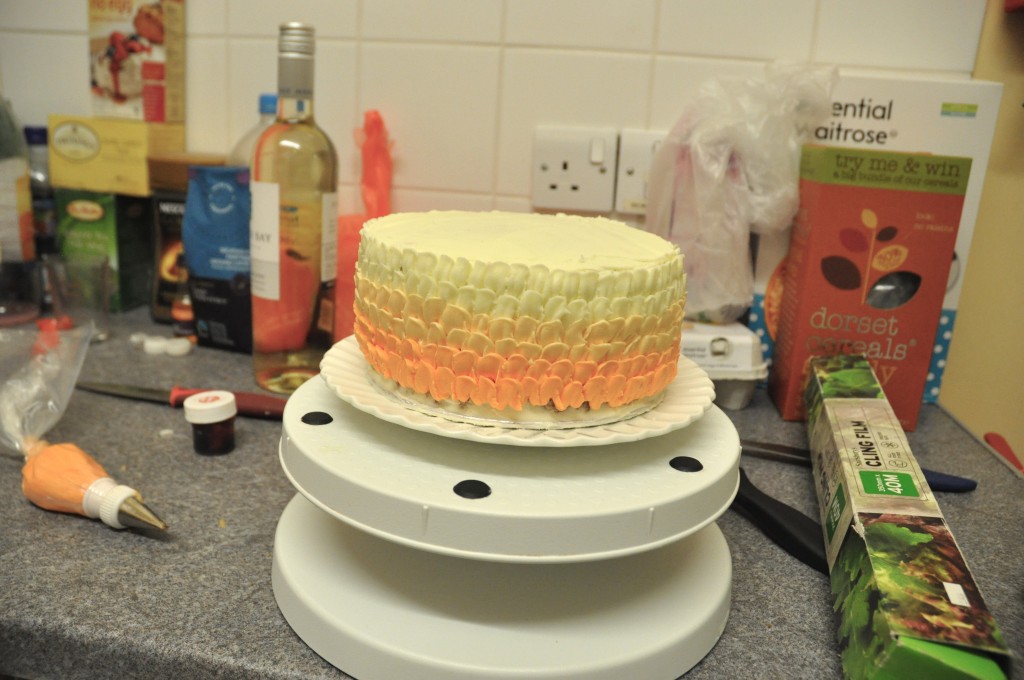
I ended up completely ignoring the guide marks I drew on the cake, but they can still be helpful. I might still use them next time, now that I have a better idea of how wide each row of petals is.
I hope this tutorial was helpful! Let me know if you have any questions and I’d love to see photos if anyone makes this cake too. :)
Happy baking!




Comments are closed.